A few weeks ago I went to this really cute cafe that was essentially a WALKING VIDEO AD for a wholesome lifestyle. By this I mean every single person that hung out there was clear-skinned, bright-eyed and bushy-tailed. I was grabbing a coffee for my mum and I wanted something nice to drink for myself, but not coffee since I’ve been off that since my 40 day practice which was, gosh, ages ago!
Anyway, my beady eye spied the iced cacao drink on their menu and it turned out to taste exactly like Milo! I’m not going to lie, I have a soft spot for Milo where my childhood memories are. We don’t keep it in the house because we don’t keep sweets or snacks or any type of processed food. My Dad has a separate storage area for his snacks but that’s a different story. My Mum was always really strict about what I was allowed to eat when I was growing up and despite my Grandma’s best efforts to sneak junk food into me (like Swenson’s ice cream after ballet class!!!!!!!!!!) those habits are locked in. I’ll have the occasional sweet treat or fried food but I feel better when I’m eating nourishing foods. But MILO, yas, I remember the taste of Milo so when I had a sip of this cacao drink it blew my mind. BUT I was kind of weirded out by JUST HOW MUCH it tasted like Milo… how did it get to taste so sweet? Have you ever tried pure cacao? It’s BITTER. It does not tasteth like chocolate milk. Probably all those antioxidants in it. Methinks there was some form of sugar in it. I couldn’t tell from the menu. It’s like those chai lattes you get from some cafes. They’re made from a concentrate and have milk poured on top. So nice and easy to drink but I wasn’t going to regularly order something that was sweetened beyond my control.
Plus it cost a lot you guys! $5!!!
I did some mulling over and turns out, this is super easy to make and you can totally save your pennies. Buy me flowers to say thanks or something with the money you save haha.
And even though I didn’t use sugar or dairy, it kind of tastes like chocolate milk! Success!
Tip: This is a great go to if you’re trying to replace your coffee habits with something else. Just don’t go crazy and have 3 – 5 glasses a day ok! One a day is plenty!!


RECIPE
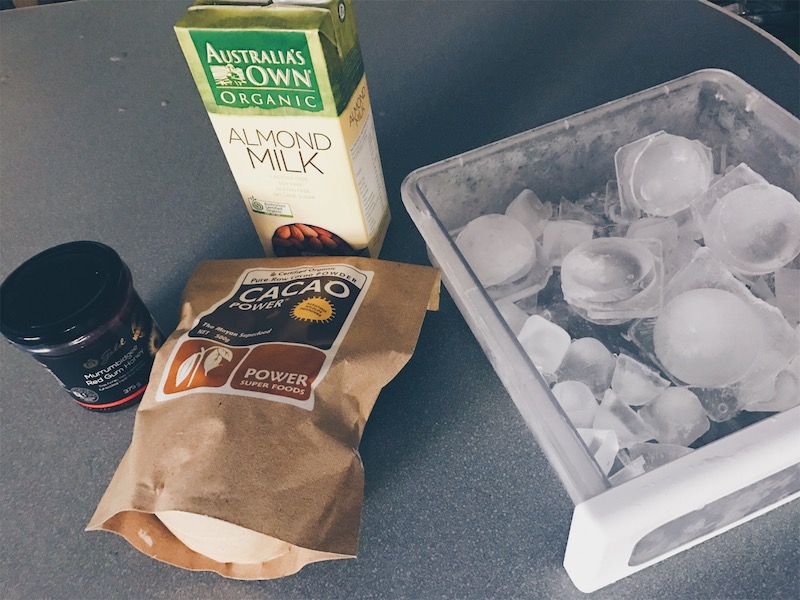
You’ll need:
Almond Milk – half a glass
Cacao Powder – 2 tablespoons
Honey – 1 tablespoon
Ice Cubes (unless you prefer a hot drink)
Boiling Water
*If it’s possible, use organic ingredients. Make sure the almond milk is UNSWEETENED, that’s kind of the whole point of doing this, right? If you don’t like to use honey, try maple syrup.
Method:
All you need to do is heap in the cacao powder into a heat proof glass with the honey. Once you add in a splash of boiling water and mix, you have your concentrate. Super easy! I don’t like to heat up honey but I make an exception in this case.
Top up with ice cubes, or if you want your drink to be hot then fill the glass up 3/4 with hot water – you’ll want to have warm almond milk to fill the glass the rest of the way up.
Pour almond milk over the ice and stir.
DONE!!! (Keep the change!)


P.S. I also like to add in supplements like magnesium oil. Since I’m drinking, right? Just do a quick scan of your supplements to see if they can be mixed beforehand, usually they just don’t mix well with dairy.
Anyway I hope you enjoyed that, if you tried it out, let me know what you think! x

Now you might be refreshed enough that you feel ready for a yoga (only 10 minutes!) or a Pilates workout! xx